




Quickstart
Run your CRO from Claude Code in 5 minutes
No SDK, no dashboard tour. Paste one prompt, your agent signs you up, reads your live traffic, and ships your first A/B test. You just approve it.
Get Claude Code or Codex
Already run an agent in your terminal? Skip ahead. If not, install one and open it in your project folder.
npm i -g @anthropic-ai/claude-code # or: npm i -g @openai/codexPaste the install prompt
Drop the Humblytics prompt into your CLAUDE.md or AGENTS.md , or straight into the chat.
Tell your agent to set you up
Say “Set up Humblytics for this site and ship a test.” No account yet? The agent runs onboarding, it hands you a verification link, you pick a plan and pay in about a minute, and it receives your API key automatically. Your key never gets pasted into chat.
It reads your traffic and proposes a test
The agent pulls ranked recommendations for your highest-traffic page, each with a CSS selector, a suggested variant, and a confidence score. You approve the one you like.
Your first test ships
It creates the experiment, splits traffic, and stops at 95% confidence, then reports back. A live, Stripe-verified A/B test, without ever opening the dashboard.
What it does
Four endpoints. One CRO loop.
Recommendations, split tests, analytics, and signup, the same surface every dashboard exposes to humans, exposed to your agent. Read it, decide on it, ship against it.
Recommendations API
Your agent calls one endpoint and gets AI-powered test ideas , each with a CSS selector, confidence score, and estimated revenue impact.
$ GET /split-test-recommendations
  ?page=/pricing

✓ 3 recommendations · 1,969 sessions analyzed

┌─ #1 Plan comparison above fold ─
│  confidence: 84  impact: High +12-18%
│  scroll: 20.5% median (site 42%)
│  variant: "4-tier comparison"
└────────────────────────────

┌─ #2 Annual-toggle default ────
│  confidence: 76  impact: Med +4%
└────────────────────────────

┌─ #3 Trial CTA above tier cards ─
│  confidence: 71  impact: Med +3%
└────────────────────────────
Split Test API
Create no-code A/B tests with text changes, CSS modifications, or element swaps, all defined in JSON. Tests go live immediately.
$ POST /split-tests

✓ Test created, running now

  name: Pricing plan comparison
  page: /pricing
  auto_stop: 14 days

  A"Single tier"        ████░░░░░░ 3.2%
  B "4-tier comparison"  ███████░░░ 5.1%

  visitors: 1,240
  status: running  confidence: 89%
Analytics API
Query visitors, conversions, top pages, and revenue data. Your agent reads your analytics to make data-driven decisions.
$ GET /traffic/summary
  ?period=90d

  visitors     14,218   ↑ 70% MoM
  form fills   90       ↑ 438%
  bounce       26.5%    ↓ 2pp
  avg session  70s

  ── top pages by views ─────────
  /              ████████████████ 8,880
  /pricing       ████░░░░░░░░░░░░ 1,969
  /skills        ██░░░░░░░░░░░░░░ 1,317
  /blog/ua-tools  ██░░░░░░░░░░░░░░ 1,193
Agent Onboarding
Sign up without leaving the terminal. Your agent initiates signup, the user verifies, and receives a ready-to-use API token.
$ POST /auth/agent-initiate
  { "email": "[email protected]" }

✓ Verification link sent
  → https://app.humblytics.com/verify/...

⏳ Waiting for user...
✓ Email verified
✓ Payment complete
✓ Property created

$ GET /auth/agent-signup-status

  authToken: eyJhbGci...kpXVCJ9
status: readyFrom ICP to an A/B-tested page. No Figma-to-dev handoff.
No manual handoff. No deploying new code to test a headline. No logging into four dashboards to figure out what's working.
Load context, design in Paper
Pull ICP, offer, and positioning into Claude Code via MCP. Generate the page straight to the codebase.
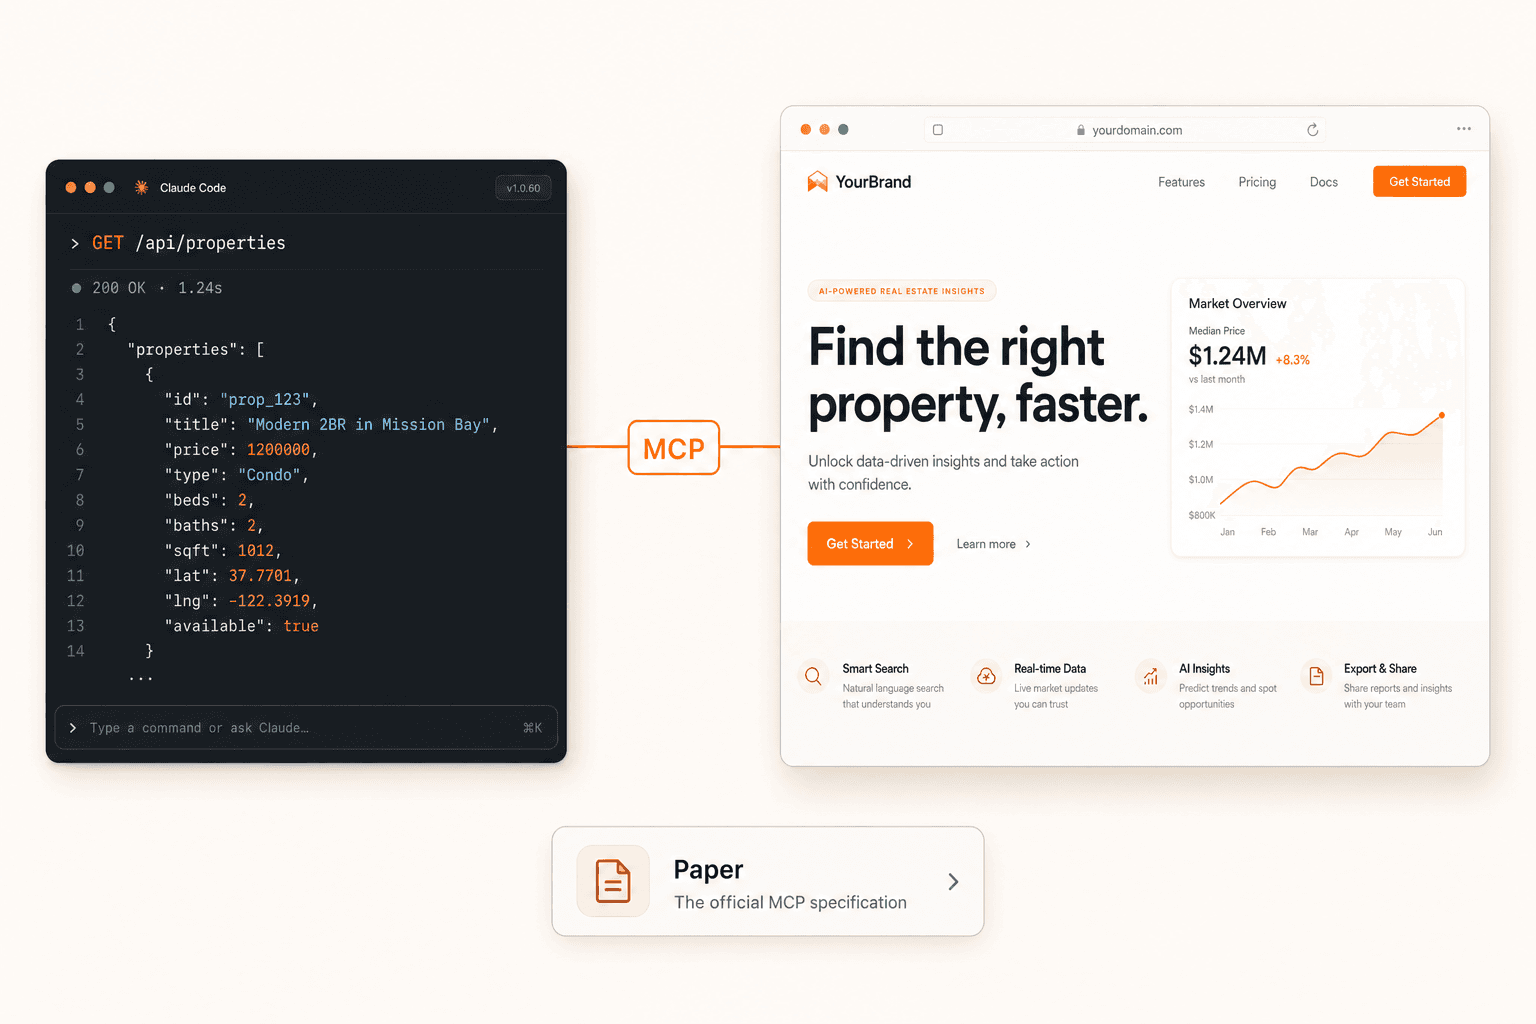
Watch the workflow
A live walkthrough with Greg Isenberg. ICP → A/B-tested page in one session, no Figma-to-dev handoff.
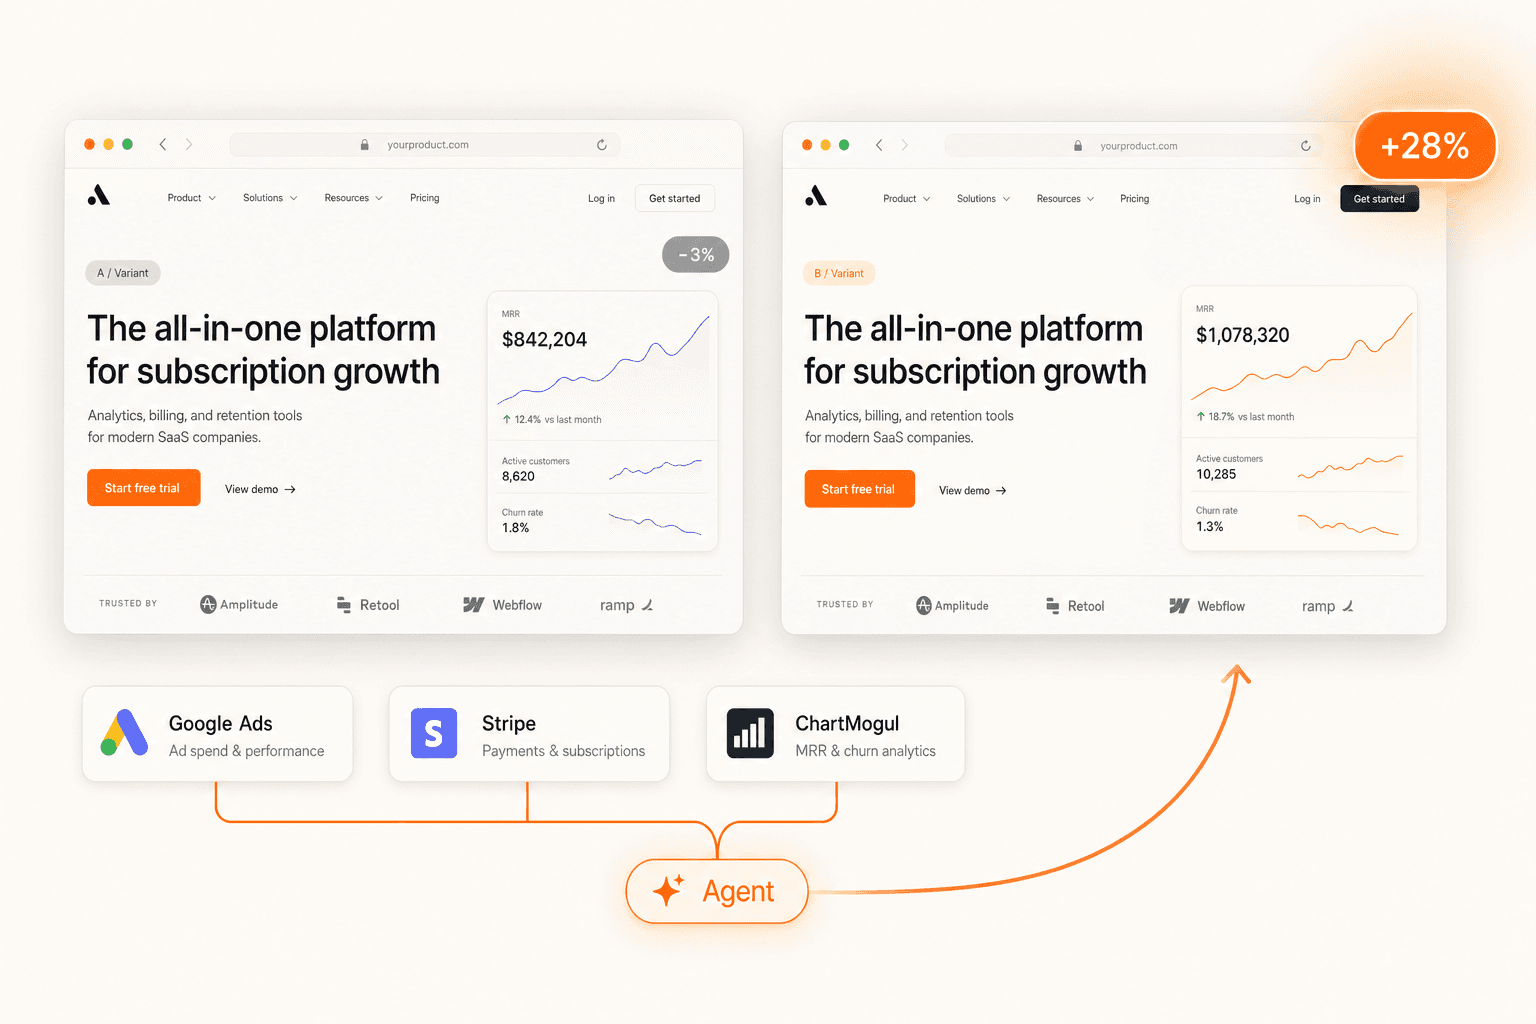
A/B test, optimize with skills
Split-test the headline without redeploying. Skills read Ads, Stripe, and ChartMogul to pick what's next.
Agent onboarding
Sign up without leaving the terminal
Your agent initiates signup, sends the user a verification link, polls for completion, and receives a ready-to-use API token, all programmatically.
Initiate signup
Agent calls POST /api/v1/auth/agent-initiate with the user's email and name. Returns a unique verification URL and session token.
User verifies & pays
The user opens the link in their browser, identity verification, plan selection, and Stripe payment all happen in under a minute.
Receive the API token
The agent polls GET /api/v1/auth/agent-signup-status and receives a JWT auth token the moment the user finishes. From there, it can add websites and start calling the full API.
Full onboarding spec
Fetch the complete agent onboarding API reference, account creation, website setup, script installation, and analytics endpoints, in a single file:
curl -o HUMBLYTICS.md https://app.humblytics.com/agent.mdHow it works
Read.
Decide.
Ship.
Claude or Codex pulls live recommendations, picks the test most likely to lift revenue, and ships the variant, same loop you'd run manually, three API calls deep.
Get recommendations
Your agent calls GET /split-test-recommendations and receives AI-powered test ideas, each with a selector, confidence score, and suggested variant.
Launch the experiment
Pipe the selectors into POST /split-tests. The agent creates a no-code A/B test with text changes or CSS modifications, the test goes live immediately.
Agent manages the rest
Set auto_stop_days: 14 and the experiment runs to completion. The agent checks back for results, then launches the next test, a continuous optimization loop.
Use cases
If you'd run it manually, your agent can run it on a loop.
Same data. Same decisions. No tab-switching.
Autonomous CRO agent
Loop through high-traffic pages, pull recommendations, and deploy tests, all without opening a dashboard.
Post-deploy testing
Wire the API into your CI/CD pipeline. Every new landing page automatically gets a split test.
Conversion recovery
When your agent detects a conversion drop, it pulls recommendations and launches a recovery test.
Bulk optimization
Manage experiments across dozens of client properties programmatically. Agencies, this is for you.
Connectors
Beyond Humblytics.
Agents that live in your terminal don't just call the Humblytics API. They compose with whatever else is on the PATH, Meta's new meta ads CLI, the GitHub CLI, your CMS, your deployment tooling.
For read-only ad data, campaign metadata, daily insights, full-funnel ROAS, connect Meta and Google Ads once at Connectors in the Humblytics dashboard. The agent then queries /api/meta-connections, /api/google-ads-connections, and /api/v1/.../ads-attribution with the same HUMBLYTICS_API_KEY. When the agent needs to managecampaigns (pause laggards, shift budget), it shells out to Meta's CLI, closed loop, one conversation, no glue code from us or you.
# 1. Read funnel (Humblytics)
GET /properties/{id}/traffic/summary
    ?start=2026-04-01&end=2026-04-30
    &timezone=America/New_York

# 2. Ship a variant (Humblytics)
POST /properties/{id}/split-tests

# 3. Pull creative performance (Meta CLI)
$ meta ads insights get --campaign_id $CID \
    --fields ad_id,ctr --output json

# 4. Pause the laggards (Meta CLI)
$ meta ads ad update $AD_ID \
--status PAUSED --no-inputPre-built agentic marketing skills
Open-source agentic marketing skills your agent loads as context. Skills that connect to Humblytics use your own API key.
Five skills connect to live Humblytics data via your API key, CRO Optimizer, A/B Test Generator, Heatmap Analyst, Revenue Attributor, Funnel Reporter. Seven are pure-context strategy skills for copy, SEO, ads, email, and content.
Add to your agent's context
Load the full API spec directly into your editor:
curl -o HUMBLYTICS.md https://app.humblytics.com/agent.mdGet started
Connect your agent in 60 seconds
Add these instructions to your CLAUDE.md, AGENTS.md, or system prompt, and your agent becomes a CRO team.
## Humblytics A/B Testing API

### Setup, API key (do this once, before the first call)
Your API key is a secret. Do NOT paste it into CLAUDE.md, AGENTS.md, chat messages, or any file that gets committed to git.

1. Create a `.env` file in your project root:
   HUMBLYTICS_API_KEY=hmb_your_key_here
2. Add `.env` to `.gitignore` if it isn't already.
3. Load it into the shell your agent runs in (or use direnv / dotenv):
   export $(grep -v '^#' .env | xargs)
4. Always reference the key as `$HUMBLYTICS_API_KEY`, never inline the literal value in commands you show the user or commit to the repo.

If `$HUMBLYTICS_API_KEY` is unset, stop and ask the user to run step 3. Do not ask them to paste the key into chat.

If the user doesn't have an account yet, fetch the full onboarding spec:
curl -o HUMBLYTICS.md https://app.humblytics.com/agent.md
Follow the steps to create an account, add a website, and get an API key, all without leaving the terminal.

API Base: https://app.humblytics.com/api/external/v1
Auth header: Authorization: Bearer $HUMBLYTICS_API_KEY

### Get Recommendations
GET /properties/{property_id}/split-test-recommendations?page={path}

### Create Split Test
POST /properties/{property_id}/split-tests
Body: { name, page, type: "nocode", goal, auto_stop_days,
  variants: [{ label, changes: [{ selector, op, value }] }] }

### Example call (safe pattern)
curl -H "Authorization: Bearer $HUMBLYTICS_API_KEY" \
  "https://app.humblytics.com/api/external/v1/properties/{property_id}/split-test-recommendations?page=/pricing"

Never substitute the literal key in place of `$HUMBLYTICS_API_KEY` when writing, logging, or echoing commands.

### Rules
- Never ask the user to paste their API key into chat; reference `$HUMBLYTICS_API_KEY` from the environment
- Never write the literal key into a file, a commit, or a command you show the user
- If `$HUMBLYTICS_API_KEY` is missing, halt and point them back to the Setup section above
- Always get recommendations first
- Only test recommendations with confidence >= 70
- Default auto_stop_days: 14
- goal: "click_through" for CTAs, "conversion" for formsTwo doors. Pick the one that fits.
Paste the install prompt into Claude or Codex, the agent signs you up, gets an API key, and ships the first test. Or sign up the human way and use the dashboard.